Database Sandboxes: Azure SQL DB
There are several ways to setup an environment for learning or development and testing in SQL Server – this post will outline working with Azure SQL database. The database will be created from a sample of Stack Overflow data and we will connect to it from Azure Data Studio. Being Azure-based, your hardware requirements are essentially non-existent. The Azure SQL environment comes at a cost of about $15/month – but with a setup this straight forward, you don’t have to keep your environment running longer than you need it.
The Stack Overflow data dump is an anonymized version of the information behind the popular site StackExchange.com. The real data included is a significant improvement over the many popular Microsoft samples (AdventureWorks, WorldWideImporters, ughh).
Read on for a walk-through of transferring the Stack Overflow bacpac from Azure blob storage to your Azure subscription and importing it to an Azure SQL database following these 4 steps.
- Import the 9GB bacpac file from another storage account to your storage account using AZcopy
- Select the bacpac file from your storage for an Azure SQL database import
- Wait 2-18 hours
- Connect
The Stack Overflow .bacpac
For traditional SQL Server, data files (.mdf) of the StackOverflow data export are graciously shared to the SQL community. If you’re interested in working with the StackOverflow database on Azure SQL database – there’s a shortcut around the process of downloading the .mdfs, mounting them on SQL Server, and exporting to Azure.
A database can be imported into an Azure database server from a .bacpac file – and there is a bacpac of the medium Stack Overflow database available for community use here. The bacpac is ~9GB, expanding to a 50GB database. You are welcome to download it to your workstation but there is a way to keep the file from ever touching your local storage.
AZcopy
AZcopy. This command line utility can be used to transfer a blob (file) directly between Azure storage accounts (among other things). It takes in the range of 1 hour to download the 9GB bacpac file and it takes in the range of 1 minute to transfer the bacpac between storage accounts in the same region. AZcopy utilizes the Azure storage REST API to complete the transfer directly between the blobs. Download the version of the AZcopy utility for your operating system (Windows/Mac/Linux) and we’ll get to work.
The copy command is summarized by:
.\azcopy cp "https://sourceaccount.blob.core.windows.net/containername/filename.bacpac?<sastoken>" "https://yourdestinationaccount.blob.core.windows.net/containername/filename.bacpac<sastoken>"I have loaded a .bacpac of the medium Stack Overflow database to Azure blob storage for general use. The source account URL with a read-only SAS token for the is:
https://dsktestdbs.blob.core.windows.net/stackoverflow/StackOverflow2013.bacpac?sp=r&st=2019-02-11T02:08:14Z&se=2020-11-12T10:08:14Z&spr=https&sv=2018-03-28&sig=ehbB0WIF9ZANHj11DLeiwQVMphhkF2q24uztPiVkeEY%3D&sr=b
![]()
- Add a storage account to your Azure subscription. If you’re region-neutral, the original .bacpac is shared from a storage account in US North Central. As a cheap fellow, I selected locally-redundant storage (LRS) with standard/cool performance/access.
- In the storage account you just added, open the Blobs blade under “Blob service”. You should add a container – this is where the .bacpac file will be stored until you load it into a database.
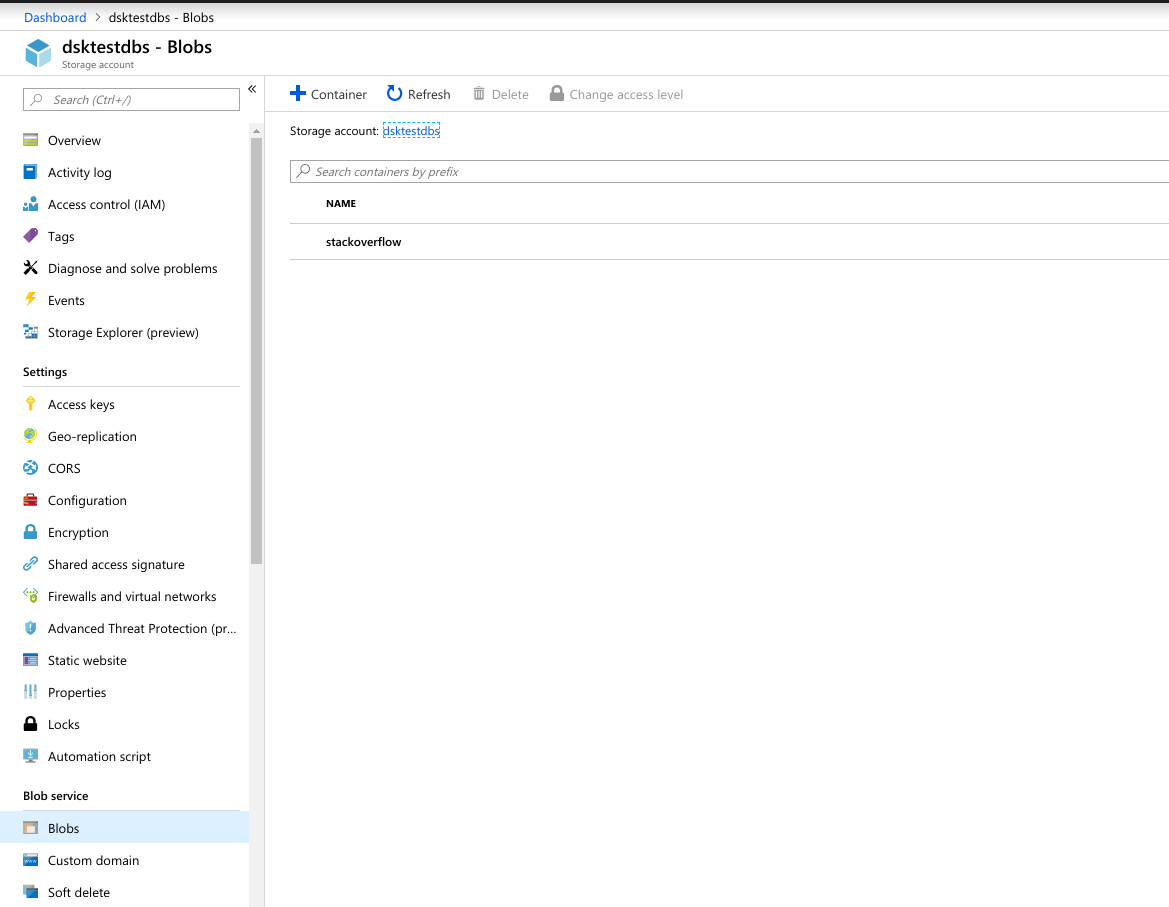
- In the same storage account, open the Shared access signature blade under “Settings”. You need to generate a SAS token/string for blob services and container/object resource types. The SAS token is a temporary virtual key to the storage account. Copy the Blob service SAS URL generated.
- Paste the SAS URL into a text editor and add the container and .bacpac file path to the URL before the SAS token. .windows.net/containername/StackOverflow2013.bacpac?

Compile your storage account URL with the rest of the AZcopy command at your local command line. Before you can execute the utility, you will need to extract the archive. If you’re lazy like me, you have a folder in your Downloads with AZcopy in it now. Once you navigate to the folder from the command line (cd for *nix varieties and dir for Windows) you can execute the AZcopy command.
.\azcopy cp "https://dsktestdbs.blob.core.windows.net/stackoverflow/StackOverflow2013.bacpac?sp=r&st=2019-02-11T02:08:14Z&se=2020-11-12T10:08:14Z&spr=https&sv=2018-03-28&sig=ehbB0WIF9ZANHj11DLeiwQVMphhkF2q24uztPiVkeEY%3D&sr=b" "<your SAS URL>"Loading the .bacpac Into an Azure SQL Database
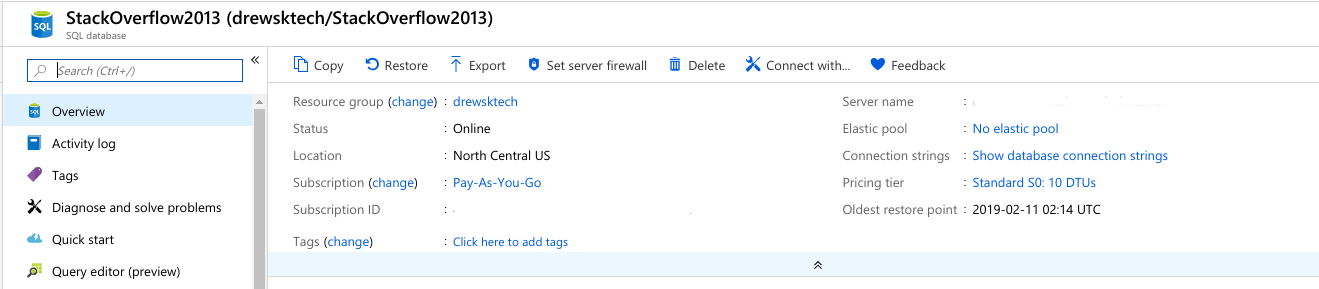
Create a logical SQL server in Azure if you don’t have one setup that you’d like to use. The option is currently listed in the marketplace as “SQL server (logical server)”. In the Overview blade of your SQL server, select the Import database option.

Save the admin password you entered. Wait. The import to an S0-sized database takes approximately 18 hours. (don’t want to wait as long? https://www.drewsk.tech/2019/02/19/azure-database-size-and-bacpac-imports/ )
You can check the progress of your database import from the SQL server Import/Export History blade. When the import has completed the notification for the import will update to the lovely green checkmark.
Connecting to Your Database in Azure Data Studio
When the database import has completed you can connect to the database from your SQL server client of choice. I would be remiss to pass up an opportunity to show off Azure Data Studio.
Azure Data Studio: Add Server Connection
From the Servers pane in Azure Data Studio, add a server connection. The server address can be found on the Overview blade of your Azure database (yourserver.database.windows.net). The sql login username and password were entered when you imported the .bacpac file. Consider putting the server connection in a group with your other testing and development connections.


Azure databases are protected by a myriad of security features and to obtain access to a database we need to modify the firewall rules to allow access from our current IP address. This can be accomplished from the Azure Portal – but Azure Data Studio can handle this for us.
Authenticate with your Azure and leave “add my client IP” selected.
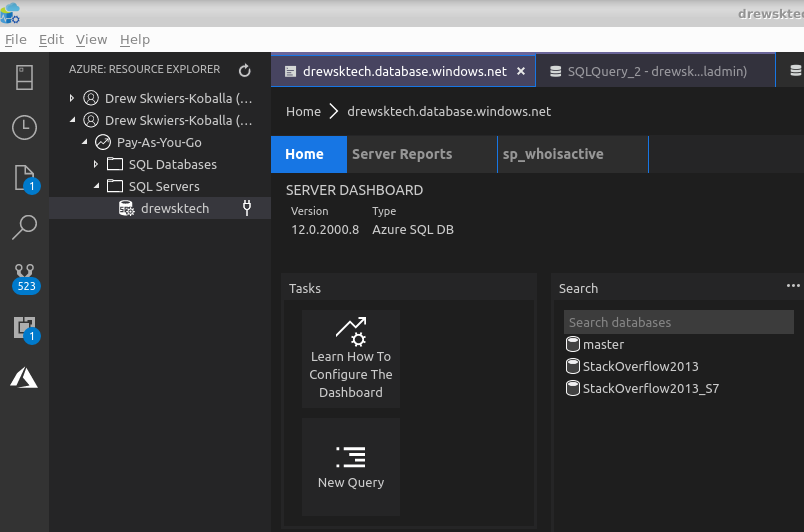
Azure Data Studio: Azure Resource Explorer
The hard work of finding your server name/address can also be handled by the Azure: Resource Explorer pane in Azure Data Studio. Clicking the connection/plug icon by a server or database name pre-fills the connection dialog with the address. (you still need to know your username/password and same process applies for firewall rules)
Done? Delete the Database
When you are done with testing or practicing or whatever fun things you do with your database, delete the Azure SQL database. From the Azure database overview blade you can select Delete and wave goodbye to your database.
Repeat As Needed
The steps we went through to import this Stack Overflow 50GB test database were summarized as:
- Import the 9GB bacpac file from another storage account to your storage account using AZcopy
- Select the bacpac file from your storage for an Azure SQL database import
- Wait 2-18 hours
- Connect
- (delete when done)
The best part is that if you don’t mind letting the bacpac sit in your storage account for about a dime a month you can destroy and recreate the Azure SQL database starting from step 2.