Building an Extension for SQL Operations Studio
If you’re not familiar with SQL Operations Studio – here’s my quick take on the application: it’s a cross-platform open-source data platform tool built by Microsoft on the groundwork of VS Code. Current functionality is a fundamental and can be extended or customized to fit your required toolset through available APIs and an extension marketplace.
I LOVE extensibility. Especially for small/medium businesses, extensibility of software can extend the usefulness of software to the business in both impact and longevity. Here’s how you can take the reins and get started creating extensions for SQL Ops Studio.
Setting Up Your Development Environment
VS Code and SQL Operations Studio
 You’re going to need VS Code, SQL Operations Studio, and the SQL Operations Studio debug extension for VS Code installed – and you can install them on any of the “big 3” platforms (Windows, MacOS, Linux*). The download links are below but if you already have them installed go ahead and check them for updates since the extensibility APIs are continually expanded.
- VS Code is not only the first cousin of SQL Ops Studio, but it is also the self-contained development environment. If you don’t have it, download and install it.
- An extension for VS Code makes it possible to actively debug in SQL Operations Studio – SQL Operations Studio Debug.
- You will be able to immediately build and test your extension in SQL Operations Studio.
Node.js
Node.js includes npm (node package manager), which you need to add the extension generator to your machine.
Yeoman Extension Generator
The yeoman extension generator puts together all the framework pieces for an extension and is installed through the terminal. (the integrated terminal can be brought up in VS Code by [cci_bash]ctrl+`[/cci_bash])
To install the generator (you only have to do this once):
[cc_bash]npm install -g yo generator-sqlops[/cc_bash]
Creating a New Extension
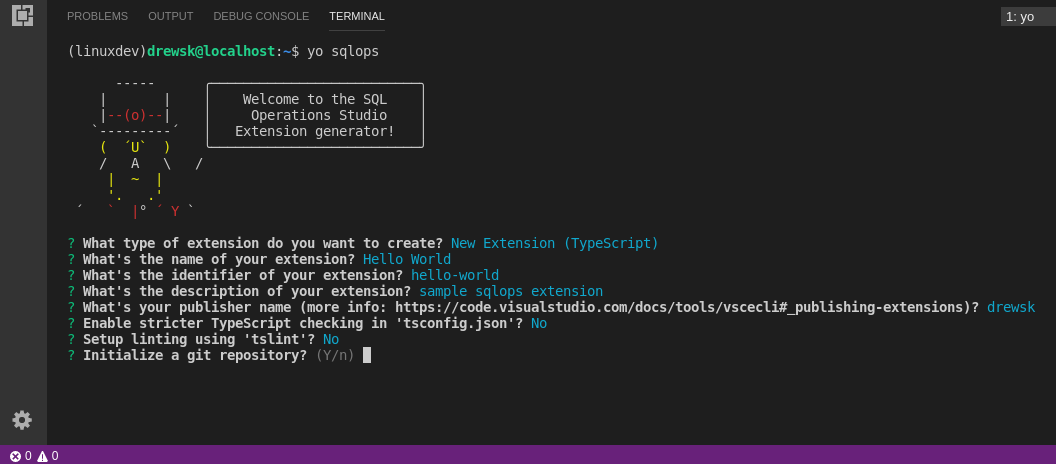
yo sqlops
To create a new extension (you will run this command each time you start building a new extension):
[cc_bash]yo sqlops[/cc_bash]
The yeoman extension generator creates a folder structure at the current location of your shell. Consider moving to your intended location before you run the command.
Leave the selection **New Extension (Typescript) **and fill in the the prompts.
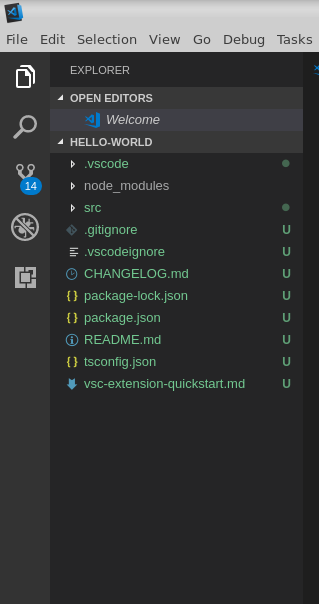
Open the extension folder in VS Code. If you’re cruising along in the terminal you can change to the new folder [cci_bash]cd hello-world/[/cci_bash] and open a new VS Code window there [cci_bash]code .[/cci_bash].
If you’re interested in what all these files and folders are for, before we move on go ahead and take a quick look at this reference from the VS Code extension authoring documentation .
 [cci_bash nowrap=”false” width=”200″].
├── .gitignore
├── .vscode // VS Code integration
│ ├── launch.json
│ ├── settings.json
│ └── tasks.json
├── .vscodeignore // files ignored when publishing extension
├── README.md
├── src
│ └── extension.ts // the source of the extension entry point
├── test // test folder
│ ├── extension.test.ts // .js, in case of JavaScript extension
│ └── index.ts // .js, in case of JavaScript extension
├── node_modules
│ ├── vscode // include vscode type definition file
│ └── typescript // compiler for typescript (TypeScript only)
├── out // compilation output (TypeScript only)
│ ├── extension.js // the extension entry point
│ ├── extension.js.map
│ └── test
│ ├── extension.test.js
│ ├── extension.test.js.map
│ ├── index.js
│ └── index.js.map
├── package.json // extensions manifest
├── tsconfig.json // jsconfig.json, in case of JavaScript extension
└── vsc-extension-quickstart.md // extension development quick start
[/cci_bash]
Make a Few Changes
The generated extension adds 2 commands to SQL Operations Studio – [cci_bash]extension.sayHello[/cci_bash] and [cci_bash]extension.showCurrentConnection[/cci_bash]. We’re going to add another command to the extension by editing the src/extension.ts and _package.json _files.
We will make 2 edits to package.json.
- In the [cci]contributes/commands[/cci] array, add another command object.
[ccn_javascript first_line=”25″]{
“command”: “extension.impressedMessage”,
“title”: “How Impressed”
},[/ccn_javascript]
- In the [cci]activationEvents[/cci] array, add another string.
[ccn_javascript first_line=”16″]”onCommand”:extension.impressedMessage”,[/ccn_javascript]
We will make 1 edit to _extension.ts _after you read the roughly 45 lines of code + comments in the template.
[ccn_javascript first_line=”12″]// this method is called when your extension is activated
// your extension is activated the very first time the command is executed
export function activate(context: vscode.ExtensionContext) {[/ccn_javascript]
Every command defined in the _package.json _file needs to have a corresponding command added within the activate function (activate shown above). In the generated template, the sayHello is added with the code shown below.
[ccn_javascript first_line=”23″]
context.subscriptions.push(vscode.commands.registerCommand(‘extension.sayHello’, () => {
// The code you place here will be executed every time your command is executed
// Display a message box to the user
vscode.window.showInformationMessage(‘Hello World!’);
}));
[/ccn_javascript]
Two associations are happening in those few lines of code. The first ([cci_javascript]context.subscriptions.push[/cci_javascript]) loads the functions of the extension when it is activated. The second ([cci_javascript]vscode.commands.registerCommand[/cci_javascript]) ties the command ID from the extension manifest (package.json) to specific code to be executed.
Alternately, those 6 lines of code could be written as these 7:
[ccn_javascript first_line=”23″]
let sayHello = vscode.commands.registerCommand(‘extension.sayHello’, () => {
// The code you place here will be executed every time your command is executed
// Display a message box to the user
vscode.window.showInformationMessage(‘Hello World!’);
});
context.subscriptions.push(sayHello);
[/ccn_javascript]
Pick your preferred version and add it to extension.ts with the command ID we added to _package.json _and a message you would like to be displayed in an information box.
[ccn_javascript first_line=”30″]
context.subscriptions.push(vscode.commands.registerCommand(‘extension.impressedMessage’, () => {
// The code you place here will be executed every time your command is executed
// Display a message box to the user
vscode.window.showInformationMessage(“I’m so proud of myself for creating a Sql Ops extension!”);
}));
[/ccn_javascript]
Enough Messing Around – Run and Debug
Let’s check out what we have by running SQL Operations Studio in a special debug session. Pressing [cci_bash]F5[/cci_bash] or by opening the Debug menu and selecting _Start Debugging _we will get a new instance of SQL Operations Studio opened where our extension is ready for testing.
**At time of writing:_ _**On both of my development machines, getting SQL Operations Studio to open with an attached debugger and load the extension has been like starting a lawnmower that sat over a long winter. (it might work, it probably won’t) You likely need to already have SQL Operations Studio open and even then you will likely get an error “extension host did not start in 10 seconds…”. I’m sure this will be worked out in an update to come soon.
**Workaround: **While not quite as helpful, you can test your extension in an extension development instance of SQL Operations Studio by selecting Start Without Debugging from the Debug menu. You won’t get helpful console logs, but you get to quickly see the current functionality.

To sample our new command in SQL Operations Studio, press [cci_bash]ctrl+shift+P[/cci_bash] and begin to type How Impressed (or the title you used for the additional command we added to package.json).
Package a .vsix
To install your extension in SQL Operations Studio or to share with others you need to create a .vsix file. You will need to update the _readme.md _ from the generated version fairly significantly or the second command will fail.
In the terminal run these 2 commands:
[cc_bash]
npm install -g vsce
vsce package
[/cc_bash]
Sharing Your Extension
I will cover the process for publishing a SQL Operations Studio extension to the marketplace in another post – but the steps I went through closely followed this guide: https://medium.com/@kevcunnane/publishing-an-extension-for-sql-operations-studio-f5a5b323c13b
Start Over Again
When you get your next great idea for a SQL Operations Studio extension, you’ll skip right to the yo sqlops section to build the extension. Let me know if I can clear anything up in this guide and have fun building!
Addendum
SQL Operations Studio was renamed Azure Data Studio at Ignite in September 2018, the content of this post also applies to Building an Extension for Azure Data Studio.